A few weeks ago I’ve bought an SDR RTL2832U+R820T2 dongle to do some tests with Software Defined radio. Despite of being able to catch some signals with the provided antenna, I have a huge interference problem originated from my desktop PC. Using the SDR dongle connected to my laptop and with the desktop PC off, most part of those interferences disappear. Still reception was poor due to the antenna quality and my office location.
So one solution for the above issues is to remotely put the SDR dongle in a better location and with a better antenna and connect the SDR software running on my desktop PC to this remote SDR dongle by using the rtl_tcp program.
Since I didn’t want to shell out a lot of money again for a RPi or Odroid C1/C2, I’ve decided to by an Orange Pi PC from Aliexpress for about 16.5€, postage included.
The Orange PI PC
The Orange PI PC is a small form computer like the Raspberry Pi and Odroid C1/C2 for example. It has a quad-core Allwinner processor that runs at 1.2GHz (under Armbian), with 1GB of memory, 3 USB2 ports and HDMI.
The Orange Pi provided operating system seems to overclock the CPU to 1.6GHz which brings a lot of stability and heat issues to the device.
The Armbian version seems to not suffer from such issues and works out of the box, including HDMI video output and apparently video acceleration (Haven’t tested it yet).
I’ve also bought, separately the acrylic box and a 2A 5V charger with the correct plug to connect to the Orange PI. The Orange PI, box and power supply took less than 3 weeks to arrive.
Starting up
The Orange PI needs an small form micro SD card to have the operating system installed and space for the file system. The recommend cards are Sandisk UHS-1 or Samsung UHS-1, but I’ve bought a Toshiba micro SD Exceria UHS-1 card, that works fine.
The card comes with a standard SD card adapter to be used when connected to a card reader.
After copying the Armbian operating system to the card on my desktop computer, and putting it the micro SD card slot on the Orange PI, I’ve just connected the network, HDMI and power.
The initial power up sequence can take several minutes, since it will expand the file-system on the SD card and probably sets up other things.
At the end there was a RED led steadily lit and a blinking GREEN led, with the Armbian desktop on my monitor.
Setting up
The following steps can be done through the desktop environment or through ssh. I’ve done all these steps through ssh:
– Change the root password from the default 1234 to a secure password.
– Change the Time Zone to my time zone: dpkg-reconfigure tzdata
– Change the hostname: vi /etc/hostname
– Add a working user: adduser opi
– Add the opi user to the sudo group: usermod -aG sudo opi
– Change the password of the opi user: passwd opi
– Move the network from DHCP to a fixed IP: vi /etc/network/interfaces
# Wired adapter #1
auto eth0
#iface eth0 inet dhcp
iface eth0 inet static
address 192.168.1.5
netmask 255.255.255.0
gateway 192.168.1.254
– Update the software: apt-get update and apt-get upgrade
– Install the rtl sdr software: apt-get install rtl-sdr gqrx-sdr librtlsdr-dev libusb-1.0-0-dev
– Blacklist the dvb modules so that the RTL software can load: vi /etc/modprobe.d/rtl-sdr-blacklist.conf
# This system has librtlsdr0 installed in order to
# use digital video broadcast receivers as generic
# software defined radios.
blacklist dvb_usb
blacklist dvb_core
blacklist dvb_usb_rtl2832u
blacklist dvb_usb_rtl28xxu
blacklist e4000
blacklist rtl2832
And finally we can reboot and connect our RTL SDR dongle.
Some final notes:
The SD card speed with the Toshiba Exceria card is:
hdparm -Tt /dev/mmcblk0p1

/dev/mmcblk0p1:
 Timing cached reads:   856 MB in  2.00 seconds = 427.67 MB/sec
 Timing buffered disk reads:  58 MB in  3.03 seconds =  19.12 MB/sec
About 40% slower than my Odroid emmc disk.
To allow the remote Gqrx SDR software to connect we need to run:
rtl_tcp -a 192.168.1.5
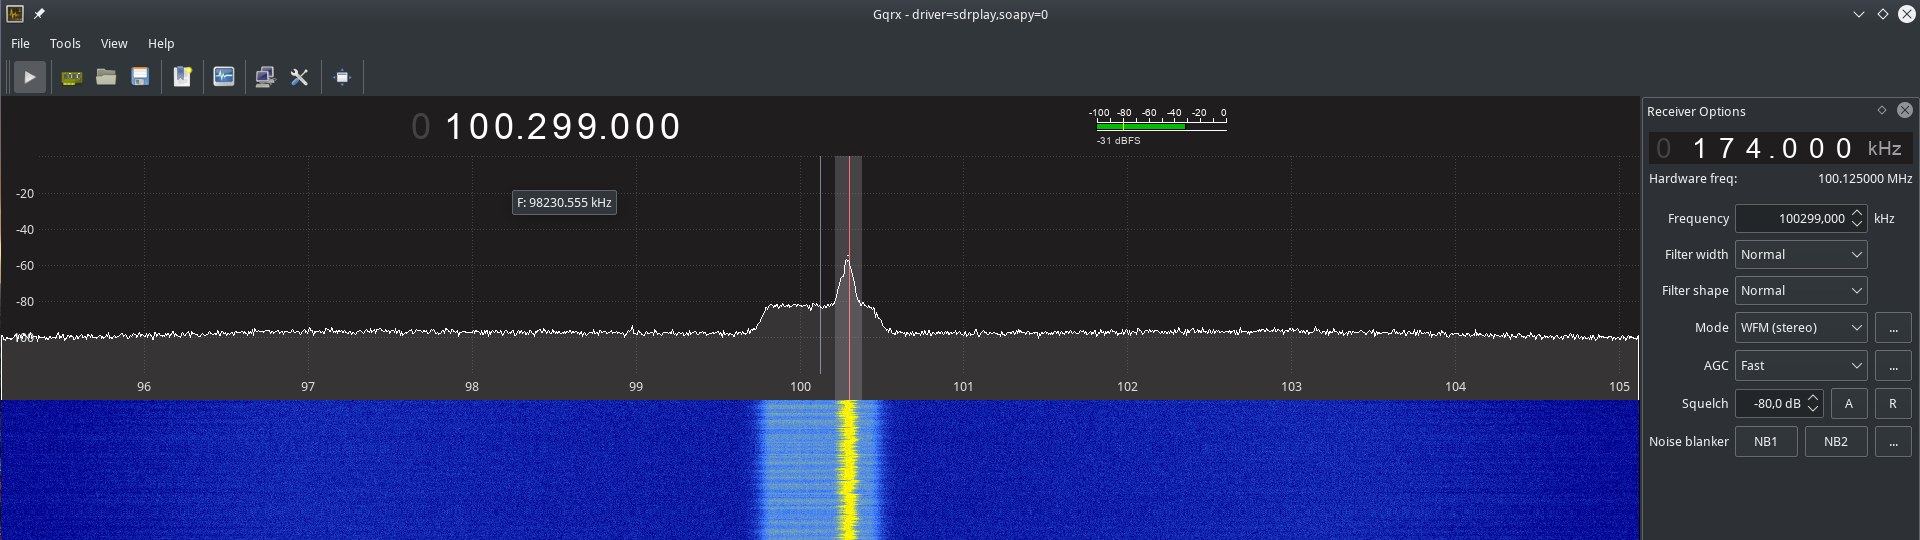
And configure Gqrx as following:

and start using GQRX.
The Orange Pi CPU and temperatures with rtl_tcp running and connected never rouse above 7/8% CPU and 43ºC, so it looks good!
Gqrx tunning
Just one final note regarding GQRX:
On the Orange Pi, the rtl_tcp program was outputting a lot of ll+:### where ### is an increasing number, and I had several seconds of lag between the change of frequency on the Gqrx aplication.
After checking the rtl_tcp code source, these messages are related to buffering issues, so I’ve changed the Gqrx connection string to:
rtl_tcp=192.168.1.5:1234,buffers=384,psize=65536
and all ll+ messages where eliminated never rising above 5.